

As someone who hosts multiple Zoom meetings with clients every week, I’m always looking for ways to elevate their experience. Recently, I discovered some newer features from the Zoom 6.0 Update, which allows you to customize your Waiting Room—and let me tell you, I upgraded mine immediately!
This simple feature gives you the chance to create a branded, welcoming space for your Zoom guests before they even enter the meeting. And the best part? It’s super easy to set up!
With the new waiting room customizations, you can:
• Add a custom title to your waiting room
• Upload a logo, image, or even a video
• Choose whether participants are listed in join order or alphabetically
• Allow specific users (like internal team members) to bypass the waiting room
• Enable chat between participants and hosts while waiting
Keep in mind that these customizations are only available on a paid Zoom Pro account.
Let’s look at the different waiting room customizations:
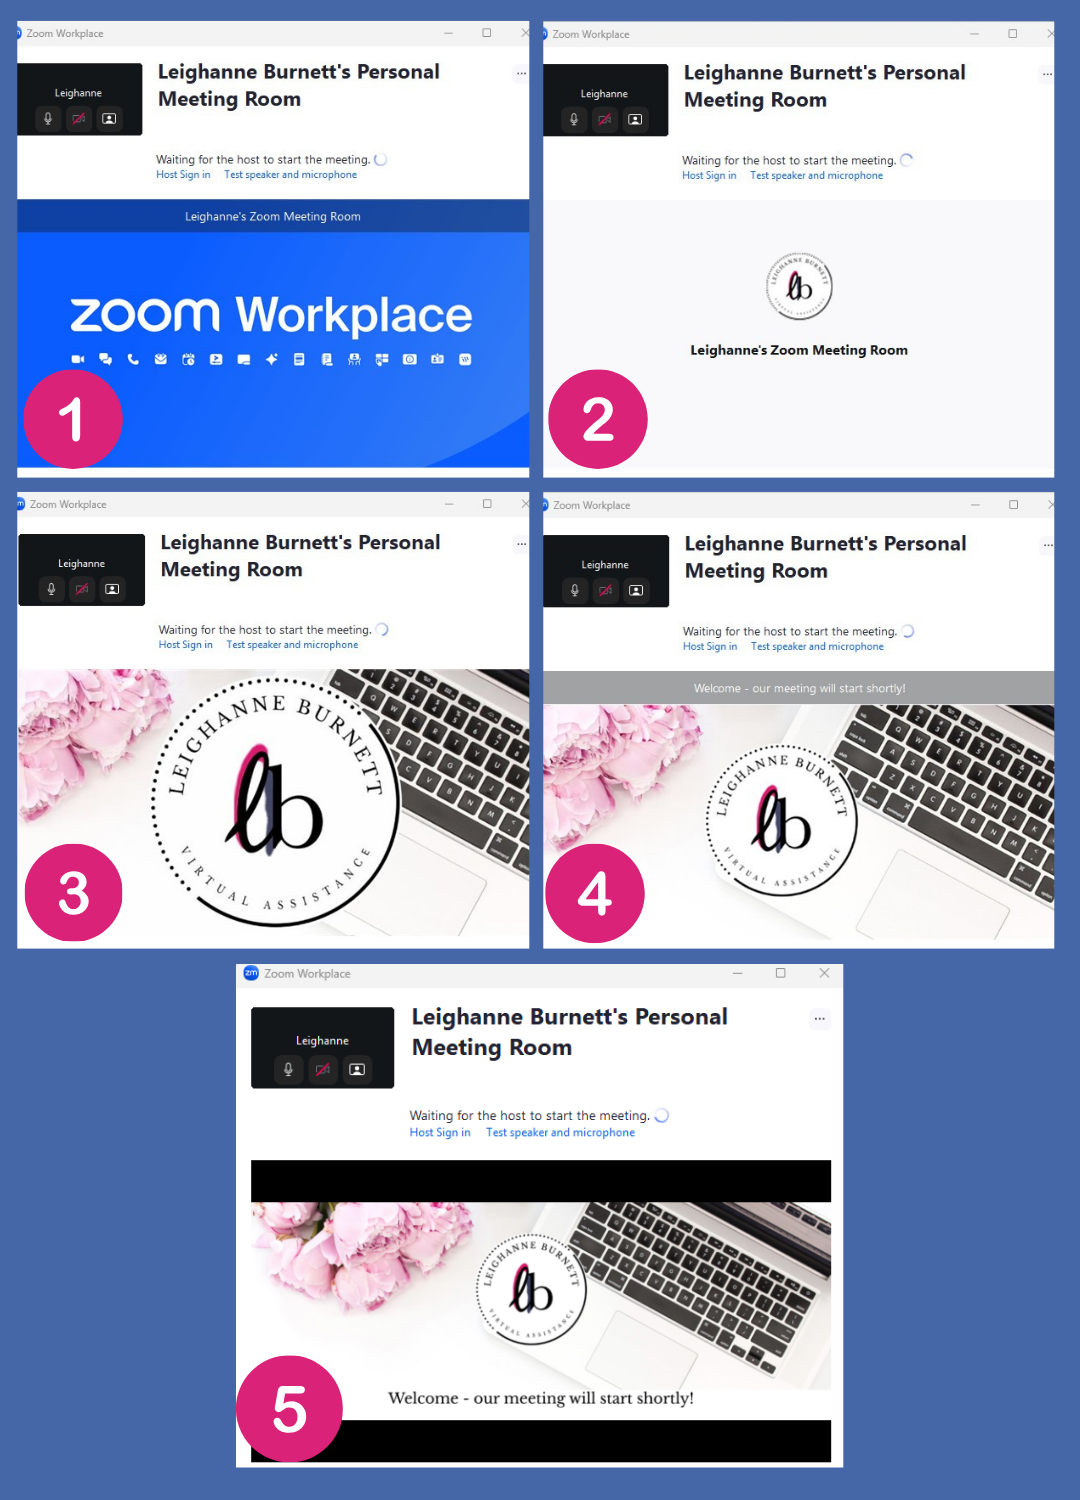
(1) Custom Title: I added “Leighanne’s Zoom Meeting Room” as a title, which appears in the dark blue bar above the Zoom Workplace screen.
(2) Logo + Description: I uploaded my business logo and added a short title
(3) Custom Image: I uploaded a branded image for my business
(4) Image + Title Combo: This version includes the branded image plus a friendly message: “Welcome! Our meeting will start shortly.”
(5) Video/Sound Combo: For this version, I took the branded image and loaded it into Canva, added in a Welcome message as well as some happy background stock music. (I have a Canva PRO account with a lot of music options!). I then downloaded it as a 1-minute video file, which was then uploaded to my Zoom Meeting Room settings. This video will continuously loop for my Zoom participants until I allow them to enter the meeting room. Give it a watch by clicking HERE. (Disclaimer: Keep in mind, this is a screen recording of another video that is playing, so the audio quality on this screenshare video isn’t as good as the sound actually coming from my waiting room.)
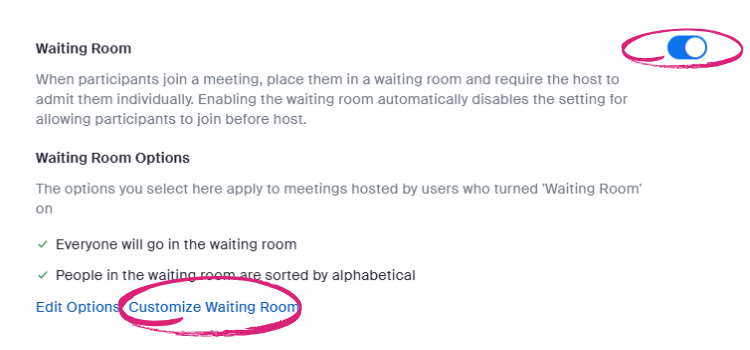
How to Customize Your Zoom Waiting Room:
1. Go to Zoom.com and log into your account
2. Head to Settings → Meetings → Waiting Room
3. Toggle the Waiting Room feature ON
4. Click Customize Waiting Room
5. Add your title, logo, description, or video
Hit Save, and you’re ready to wow your guests!
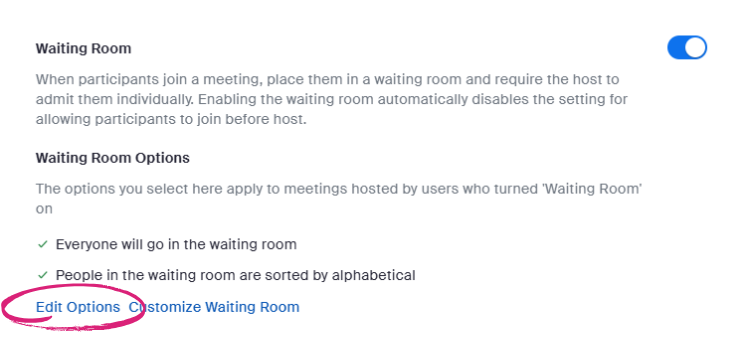
For these customizations, you will return to Settings → Meetings → Waiting Room, and click Edit Options:
• Choose whether participants are listed in join order or alphabetically
• Allow specific users (like internal team members) to bypass the waiting room
Enable chat between participants and hosts while waiting
Whether you’re meeting with clients, hosting events, or collaborating with your team, these new features are a great way to enhance your virtual presence and make your meetings feel more personalized and professional.
Try it out—and let me know how you customize yours!